Showing posts with label 3-D Flowers. Show all posts

Thursday, February 14, 2013

Chantilly Easel Card

Happy day of love to you all!


Chantilly is a beautiful paper packet and has some great textures and colors.   If you've read my blog for some time, you know that pinks and the more cool colors are difficult for me to work with.  However, there is so much warmth to this paper!  Ruby and buttercup embellish the lighter pink and blue.  And, of course, it's always fun to make an easel card!

Don't forget to come back tomorrow for the Rose Blossom Blog Hop!  There is some fabulous inspiration for you in the 10 blog hops stops, and there are prizes to be won!!

Pin It

Thursday, January 17, 2013

When Friends Meet

This is paper I've had in my stash for a long time!  Maybe 5 or 6 years?  It's so pretty and it has a beautiful matching stamp set.  When I just want to create to feed my soul, I often look to these supplies.  I used this week's Mojo Monday sketch as a jumping point.


If you've been reading my blog for a time, you know that one of my favorite color combinations is Smokey Plum and Olive.  They are just so lovely together!!  Of course there are plenty of flowers on this card!

Thanks for stopping by today!

Pin It

Wednesday, December 19, 2012

Avonlea Beauty

I don't know what it is about this time year, but I always start digging through my stash to see what treasures I can find.  I start thinking about how blessed I am to be a paper crafter and that I need to use things up - most likely so that I can buy more!!

Well I found this unique shaped box in my "big box of stuff," and I decided to cover it with Avonlea.


I started out by painting the edges of the bare wood with grey acrylic paint.  I used Liquid Glass for the rest of the project (I really should have stock in Liquid Glass!).  It works well for adhering paper to wood surfaces, and it worked extremely well to bond the pieces together.    From there, I was able to decorate this in whatever way I wanted!


Avonlea lends itself well to a vintage look, so of course that called for rolled flowers from the Artiste cartridge and loads of bling!  This would be pretty to hold cards, mini albums (I am always looking for a place for those!), or letters.

What have you found in your "big box of stuff" lately?  Thanks for visiting, and I hope you  have a blessed day!

Pin It

Friday, November 2, 2012

Cut it Up Challenge #5

What a wonderful month of gratitude!  With that thought in mind, at Cut it Up, we'd like to see you make a thank you card .  Of course, don't forget to use a die-cut!


I am all about using up my scraps, so I grabbed these Echo Park Times & Seasons scraps.  I finished off this card by making some rolled flowers from the Art Philosophy cartridge.  The vintage crocheted ribbon pairs very nicely with the flowers.

The random winner of this challenge will receive the Wild Horses stamp set from Mark's Finest.  Be sure to play along!!

Thursday, October 25, 2012

My Creations Card Box


I started a project today, and I thought I would share what I have done so far.  This is the My Creations Card Box, and I've decorated it with Avonlea paper.  Everything about this paper feels very vintage to me, and it makes a lovely gift!  I started out by sponging the box edges with Slate ink, and then I covered it with Slate cardstock.  From there, I covered the box with Avonlea paper. (I cut the Avonlea paper 1/8" smaller than the Slate.)

I wanted to show you a close up of the top of the box, so that you could get a proper look a the embellishments.  I cut five rolled flowers from the Artiste cartridge (have you asked me for information about this cartridge yet?), and I put large pearl opaque gems in the centers.  I don't always do that, but I wanted them to be a little fancier for this box.  I added three cardstock and one ribbon banner to the top of the box, and I stamped the lower banner using a sentiment from Family Tree.  That gave me a good base with lots of interest for the flowers, and I mixed in some Slate flourishes (which are super nice because they bend), a Bling trinket pin, and some pearl opaque gems.  I had a little piece of  rosette ribbon cut, so I finished off the whole cluster with that.

I'll be showing you what I will be putting in the box tomorrow.  I do want to tell you that this is one of the items that I will have for sale at the Cross of Hope craft boutique.  Here is the information, and if you are local, I would love to see you there!  (Check back tomorrow because I will have a coupon for you to use at the boutique.)

Cross of Hope Lutheran Church Craft Boutique
5730-179th Lane NW
Ramsey, MN

Saturday, November 10th
9:00 am - 3:00 pm


Wednesday, October 10, 2012

My Creations Star Class


Since these stars have been released, I have made several.  I LOVE our My Creations products, so of course, I had to have a class for making a Christmas Star!  You can participate in this class here at my home or long distance.

Sunday, October 28th
4:00 pm
$18.00
(All supplies included - just bring yourself!)

This class will take approximately 90 minutes to complete, and I know that you are going to love it!  If you would like to participate long distance, you can order your kit right here, and it will be shipped to you on November 1st.  There is an additional $5 to cover the cost of shipping.


Wednesday, October 3, 2012

Gratitude

I was in the mood to just sit and play in my craft room this evening.  I love when I have the time to do that! So I grabbed my Flirty paper and got busy!


I sponged all the pieces of the card with bamboo ink.  Naturally when I have the time I make flowers. (Does that surprise you?)  For this card, I made a yo-yo and a rolled flower, and both were cut with the Cricut Artiste cartridge.  In order the match the color ready ribbon to the card base, I sponged it with goldrush ink.  (One of my favorite techniques!)  The sentiment is from a beautiful Thanksgiving set called Abundance.

I'll be entering this card into three challenges:


Saturday, September 29, 2012

Recipe/Card Box


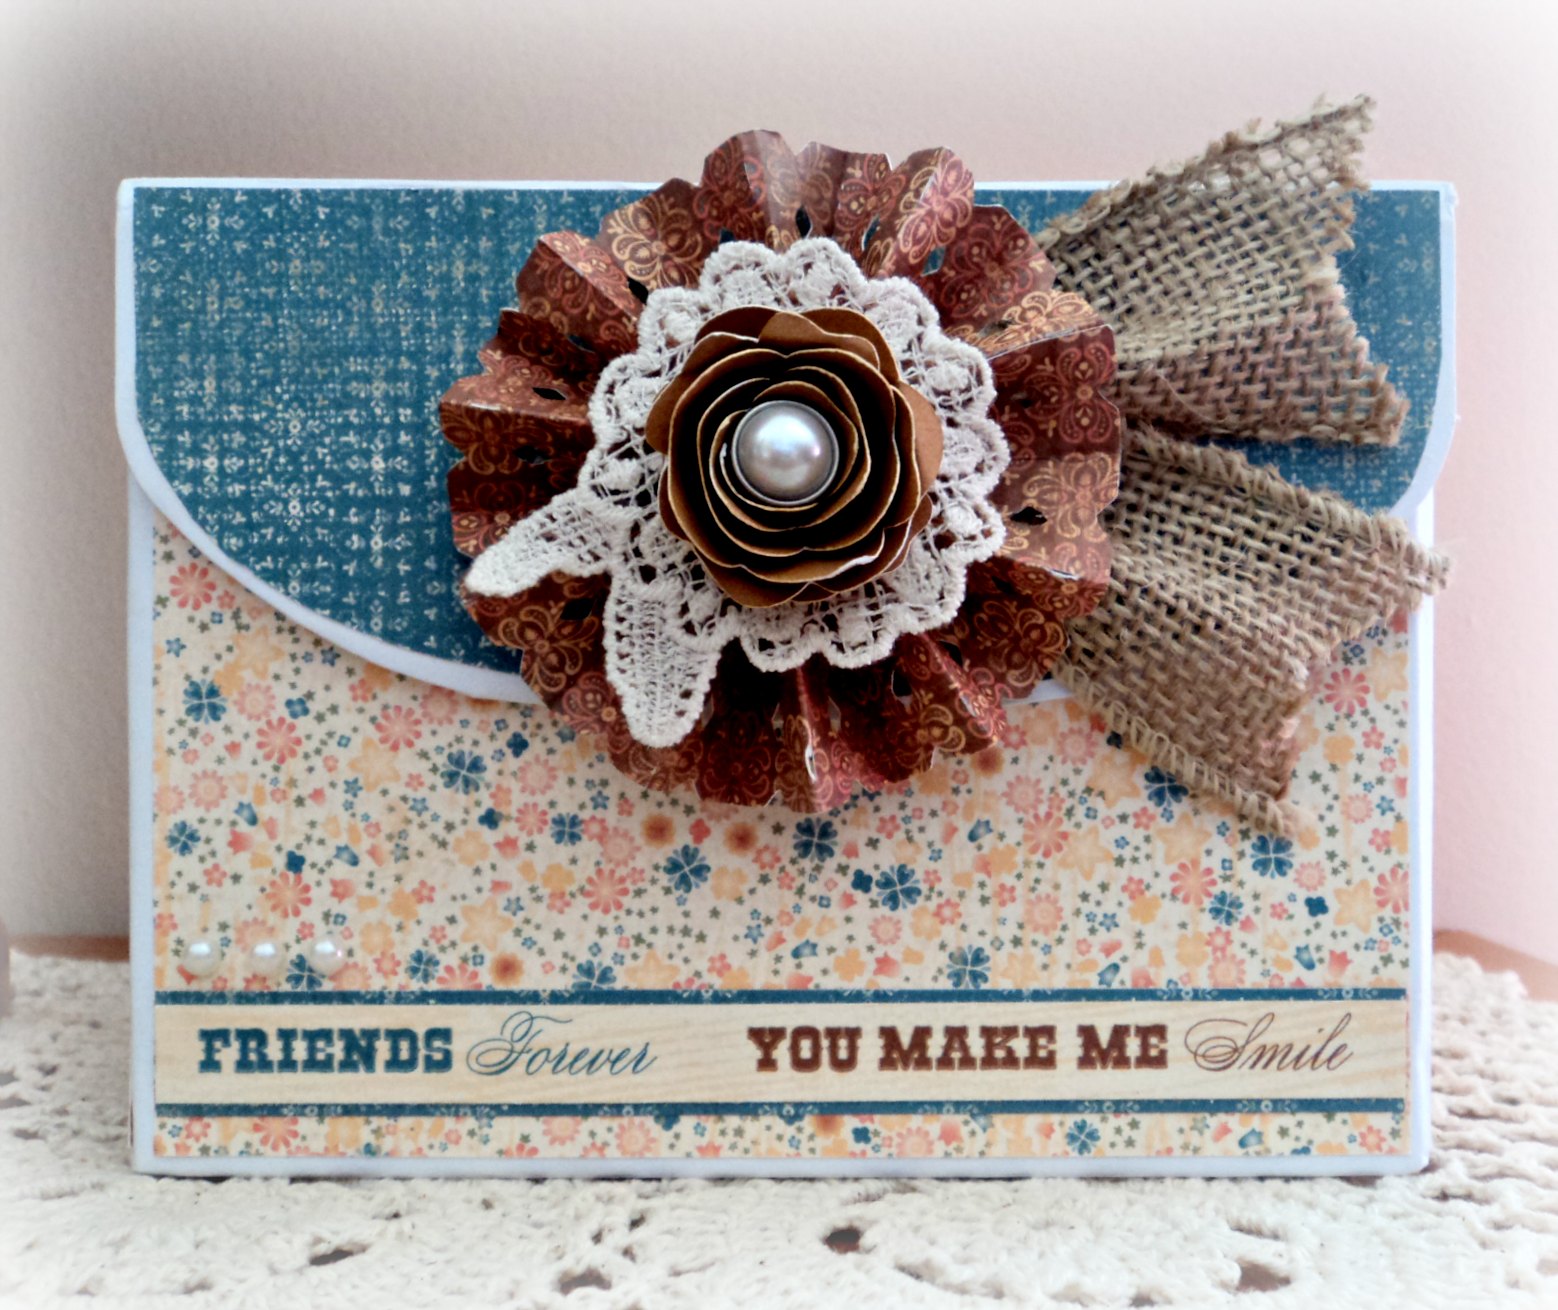
This is one of my favorite My Creations items.  (Did I say that yesterday about the Display Album?)  It is so versatile, and I have used this for many things.  I have one for my vitamins, one for cards from my team members, and I have one for photos.  I can think of many other uses, too!  Well, for this one I used the delicate fall floral pattern of Clementine.


One of the wonderfully unique cuts from the Artiste cartridge is the yo-yo flower.  I love making these will all of the different scallops and cuts.  I added floral doily from the Bohemian Assortment and then a rolled flower on top of that.  I tucked some burlap under the flower, and I am going to give you a tip about this.  You need to make sure that the flower and ribbon are really secure because you will be opening and closing the box often.  I used Liquid Glass to put together the flowers together, and I also used it on the burlap.  I'll tell you, that flower and ribbon are not moving!


As you can see, I turned this into a card box for the Operation Smile auction.  I cut the file tabs using the Artiste cartridge and simply stamped them with the November Stamp of the Month (mark your calendar -you will like that one!).

All of the items used to make this box can be found on my website!

Sunday, September 2, 2012

La Belle Vie Star

This is one of the new Close To My Heart My Creations items.  I loved that we have such a large star to decorate!  It is 12", flat on the back, and hangs beautifully on a wall.


I pulled out some La Belle Vie (it's never far away...!)  The first thing I did was sponge all the edges with Slate ink.  After I was all done, I thought that my brayer would have worked nicely, too.

I cut the flowers with the Artiste cartridge at 2-3/4" and before I rolled them , I sponged the edges with Slate ink. Even thought this project uses dark colors, it still has a very romantic feeling to it, so it will go on our bedroom wall.

I hope that you are having a blessed holiday weekend!  I so appreciate that you took the time to visit!!

Wednesday, August 22, 2012

Cricut Artiste Video and a Project

This is a fabulous video that does a great job of showing you the technicalities of the Cricut Artiste cartridge!


Now I wanted to show you something I put together this afternoon using all of the new 3-D rolled flowers.  I love flowers you know, and I think that this little box fits piles and piles of flowers together perfectly!


Don't you think this would make nice centerpieces on a bridal shower table?  I've used the Clementine paper along with some Rhinestone Brads, Bohemian Doily, Color Ready Ribbon (inked with Creme Brulee), and pieces of Colonial White Rosette Ribbon.

Now I'd like you to stay tuned for Saturday.  My team is having a blog hop!  We will be focusing on the Cricut collections and showing you some great 3-D projects, and of course, there will be prizes involved!!

Tuesday, August 7, 2012

15-Minute Gift Bag

I wanted to show you just one of the pretty gift bags that you can create with the Cricut Artiste cartridge.  Truly this is a 15-minute project!  I've used La Belle Vie paper - my new favorite!  (Well, at least for now!)


The Artiste manual told me to cut this bag at 4.5", so I did just that.  To make things easy for yourself in creating this, don't remove your mat.  Go on then to cutting the two accordion folds at 2" for the medallion and the 4" flower for the center.  Before putting it all together, I quickly sponged the edges with Desert Sand pigment ink.  The 1x1 size of the pigment pad is perfect for doing edges quickly.


The Cricut scores the accordion fold lines and when that was together, I added a little black tulle (I love this product!) and rolled up the rose for the center.  Liquid Glass is the best adhesive for putting this altogether for a firm bond.  When it's all put together this bag measures about 4.5" tall and 5.5" wide.  It's just perfect for  gift of jewelry, gift card, or any other small item.  And what a pretty way to give a gift!

Keeping watching because I am busy discovering what this cartridge can do!

Saturday, April 21, 2012

Dotty for You Initial

I have a couple days that I can spend crafting at leisure, so look out!  You may see a lot of little projects!

I always make a gift for my hostesses - whether they are near or far.  It's one of the great pleasures of my job.  I so appreciate when people allow me into their homes for a few hours!  This is what I gave my hostess this morning.

This is a simple wooden letter that I picked up.  It was easy to work with because it was already painted white.  I simply adhered Dotty for You paper to the front and then used a craft knife to cut around the edges.  Now of course I had to make flowers!  Any time I get the chance to use the dark chocolate striped grosgrain, I pull that out, too.  It makes the nicest bows!  A couple of flutter shapes and opaque gems, and it was done.

I'll have another new project for you tomorrow!

New Book, New Look!

Sometimes it just that time to make a change.  I've had this blog you are visiting for 12 years!  Wow, that's a lot of post and a lo...